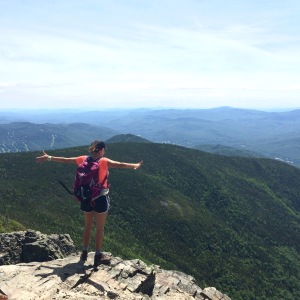
 Like all grateful New Englanders, I LOVE Boston in the summer. But when the nice weather hits, I’m setting my alarm at 6:00AM on weekends and jumping in the car to drive 2-3 hours north for the day. Why would I do anything so crazy? Just a little range called the White Mountains. Thanks mostly to my mountain-loving other half, I have officially been bitten by the hiking bug. While the city is mighty pretty in the summer, there’s something special about the blue skies, 360 degree vistas, and the glorious endorphin high from a good hike. These mountains are gorgeous, for sure, but they’re pretty challenging to scale and it can be intimidating to figure out how to get started. Here are my tips for novices, along with some great resources to get you up and hiking.
First and foremost, be prepared! Most hikes in the Whites are lengthy and strenuous, so make sure you are ready for 5+ hours of work. I suggest bringing the following:
- Synthetic clothing and lots of layers: even if it’s 80 degrees in the valley it could be in the 50s at the summit, so always have extra layers. Be prepared for changeable weather conditions and lots of wind up top.
- Proper footwear: ideally, hiking boots or trail running shoes. Good sneakers should be fine if you’re just starting out, but consider investing in something with better traction and support.

- Water, water, water: Even if the weather isn’t super warm, hiking dehydrates you quickly and there may not be anywhere to safely refill along the trail. I usually bring at least two liters, and more if the hike is particularly long.
- Food, and not just snacks, but something for a proper meal. Trail mix, jerky, and peanut M&Ms are great fuel, but you’re going to want a real, hearty lunch–think meat, cheese, veggies, protein, etc.
- A proper daypack: You are going to be way happier hiking if you have a pack with a waist strap and chest strap. I absolutely love my Osprey daypack, if you’re in the market!
Choose wisely: The Appalachian Mountain Club (AMC) has wonderful guidebooks that describe the various hikes, and you can also look around at sites like this one for more information. When they describe a hike as difficult, they mean it–don’t get cocky! Pick hikes that are appropriate for your timing and skill level. Just because you’re fit does NOT mean you should pick the toughest trail on the mountain. Start small and build your way up!
Also, some bonus wise words from hike-master J: Schlepping through the woods up and down rocks and roots in the humidity can a take a toll on your spirits (why does the last mile take so long!) Do yourself and your mountain-mates a solid and stay positive. If you need an outside influence try bringing some hard candies (just like grandma)–a little bit of sugar will keep you going!
I have just scratched the surface of what there is to hike in NH (let alone the rest of New England) but I do have a couple of hikes I recommend for newbies, listed from easiest to most difficult:
- Blue Hills: a local Boston area option with skyline views–the trails are not well marked, so skip this one if you get lost and/or frustrated easily
- Zealand Falls: a short but rewarding hike to Zealand Hut (more on the huts below!)
- Mount Mondanock: a wonderful mountain to get you started–super popular, with rewarding views
- Mount Garfield: a great first 4000 footer with some spectacular views
- Mount Mooislauke: a good challenge if you’re ready for the next step–the 360 vistas at the top are worth it!
If you want to turn your trip up north into a multi-day adventure, look into your options for camping or get a teeny bit more swanky by staying at one of the AMC’s huts. I have a bit of an “in” here since my brother worked up at the huts for years, but staying at one is an incredibly unique experience. You get:
- A comfy bunk to sleep on (BYO sleeping bag)
- Delicious home-cooked dinner and breakfast (they’re super accommodating for gluten free guests!)
- Fun extras like naturalist talks, hilarious skits by the caretakers (the “croo,” to the initiated), activities for the kiddies, and indoor bathrooms/access to clean water, drinks, books, games, and snacks.
Most importantly, staying at the huts means you can get a several days of hiking in without having to camp overnight and carry all of your food with you. It’s not cheap, but it’s worth it! J and I are doing our first multi-day hut trek in a couple of weeks, so more to come on that front.
Happy hiking!


